INSTRUCTIONS
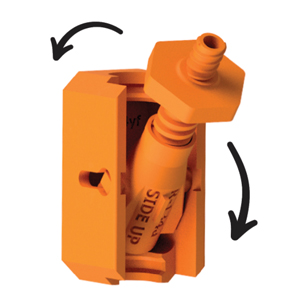
Étape 1
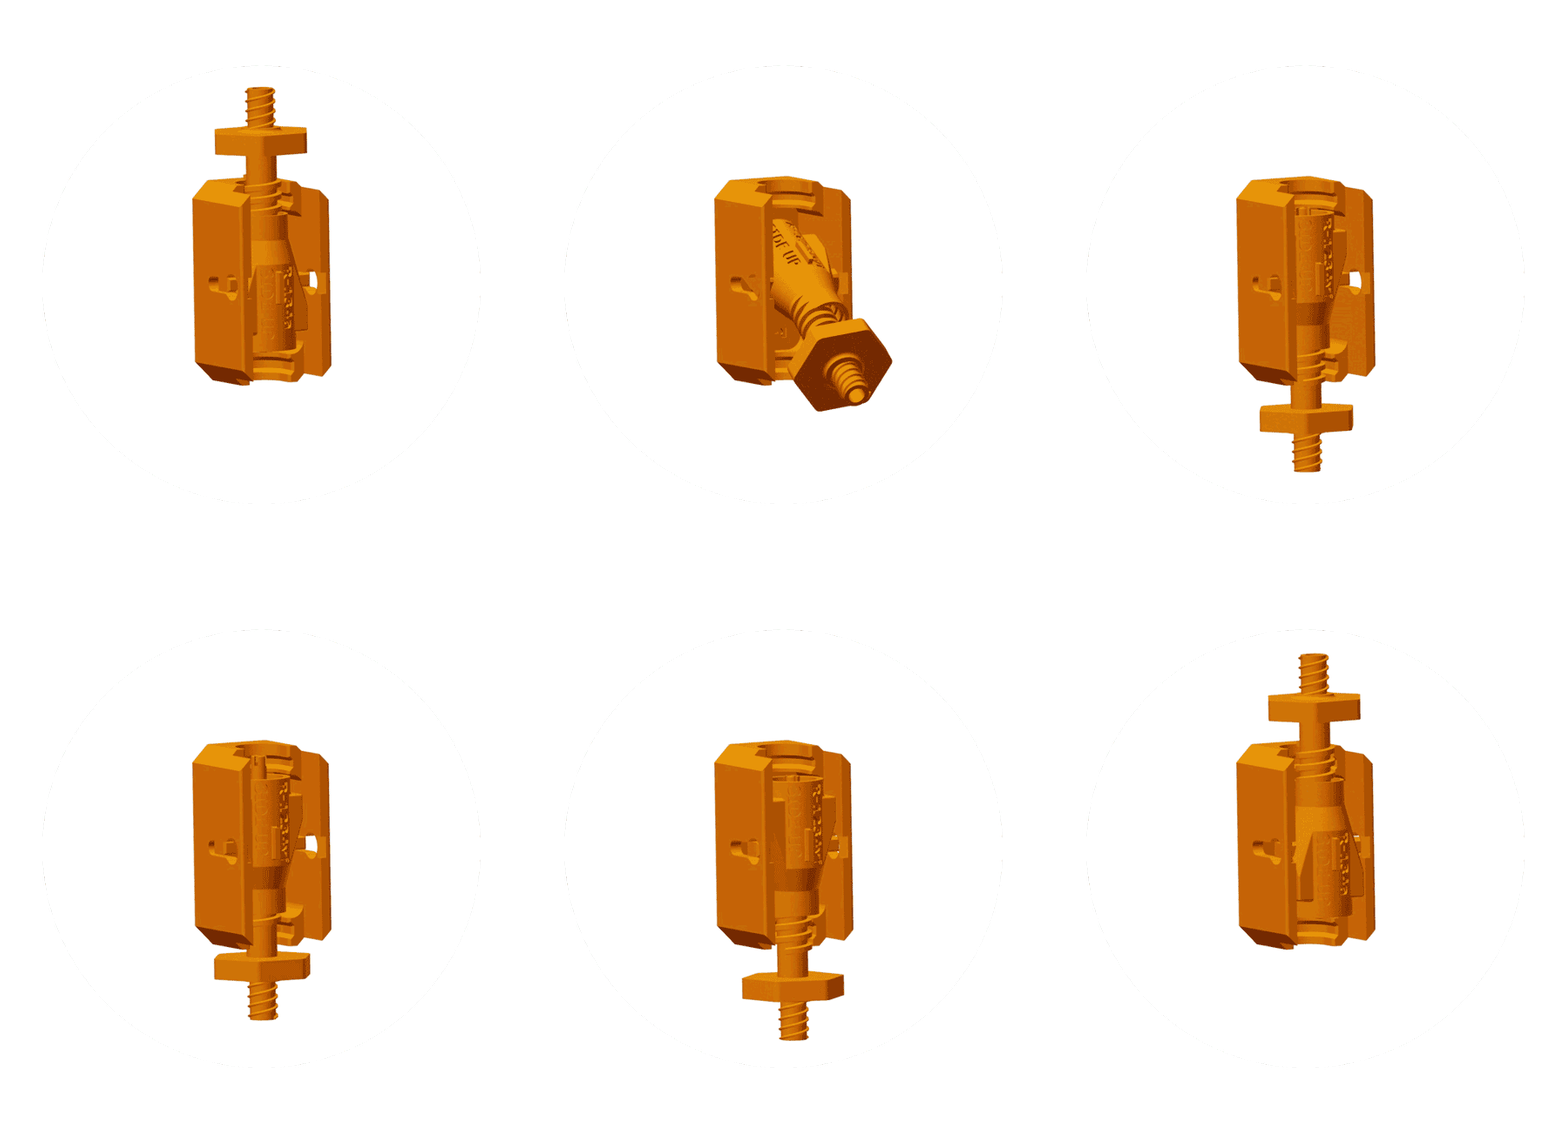
Identifiez le type de système réfrigérant (voir le manuel du propriétaire) et préparez l'adaptateur. En tenant l'adaptateur double dans la main, faites pivoter le corps intérieur pour soit R-134a ou R-1234yf SIDE UPselon le type de votre système.
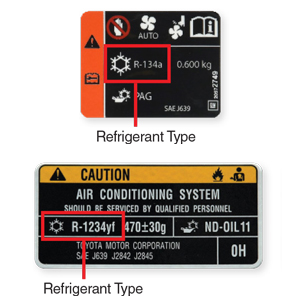
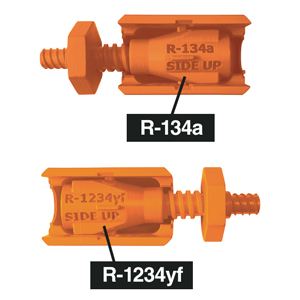
Étape 2
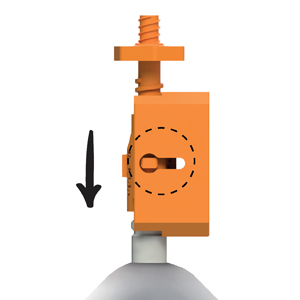
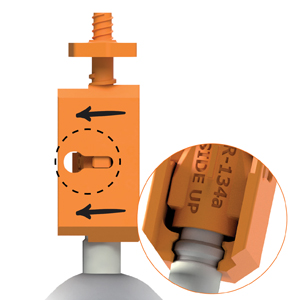
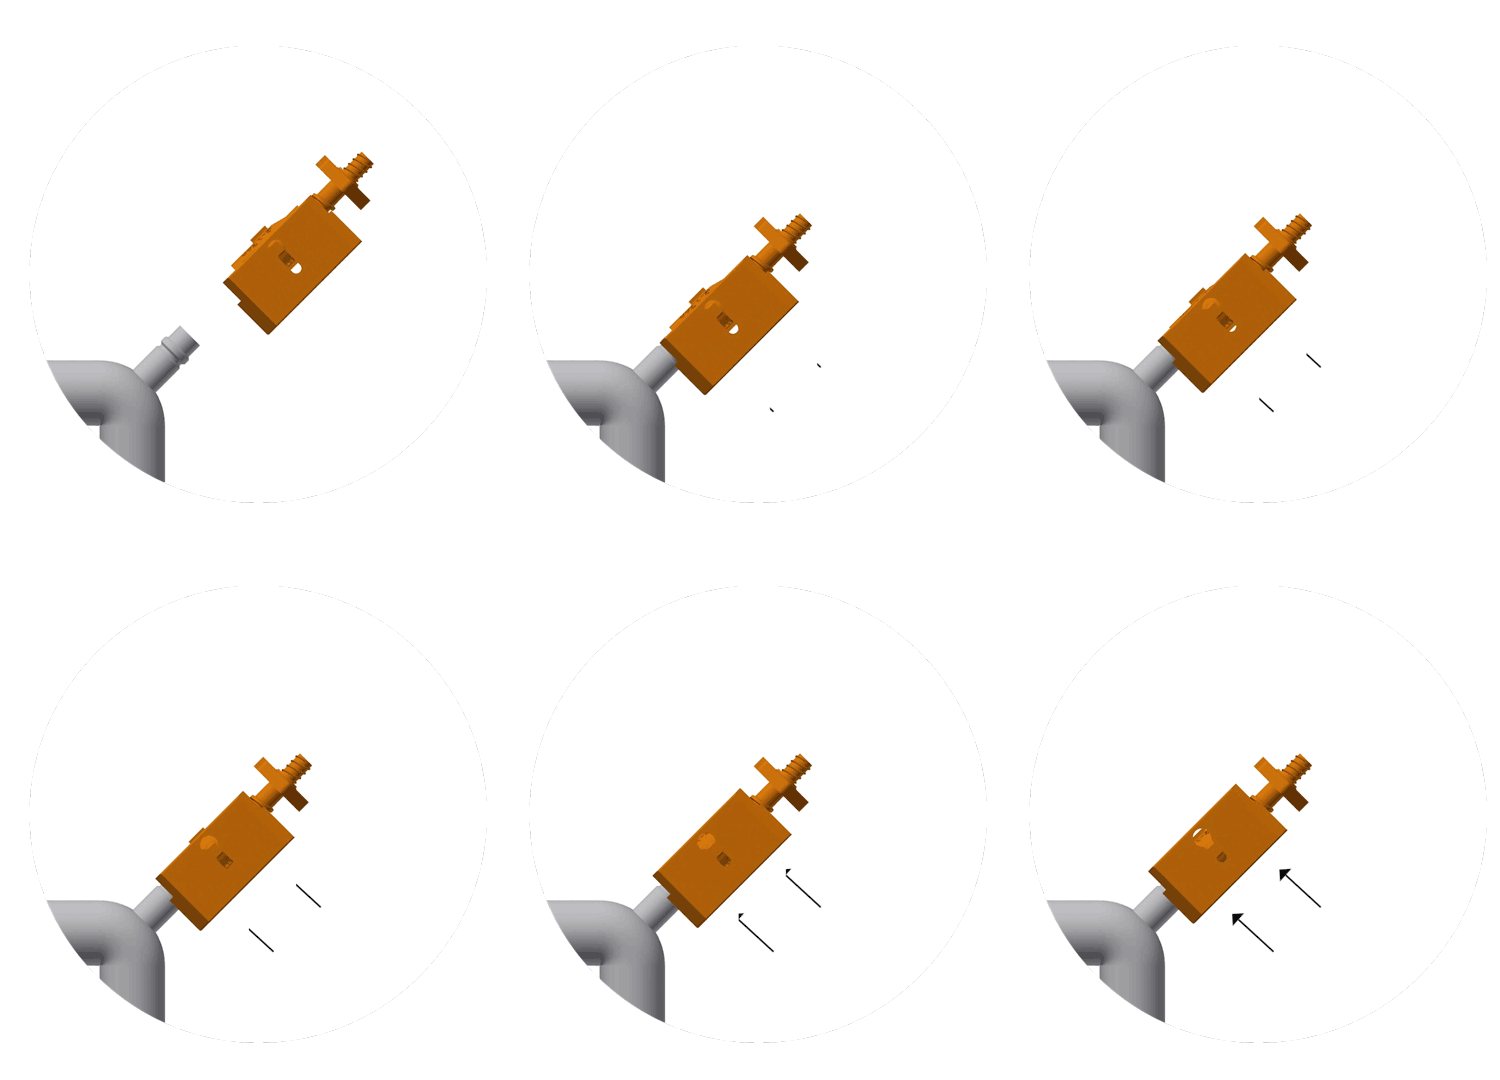
Localisez le port de service de climatisation du côté inférieur. Poussez l'adaptateur sur le port de service du côté inférieur.
NOTE : Assurez-vous que la glissière extérieure est poussée vers l'arrière, loin du corps intérieur (voir la ligne pointillée).
Étape 3
Pousser la glissière extérieure vers l'avant pour verrouiller l'adaptateur en place.
NOTE : La connexion doit être serrée et non pas lâche. Si la connexion est lâche, l'adaptateur ne fonctionnera pas correctement. Répéter l'étape 2 jusqu'à ce que la connexion soit bien serrée.

Étape 3
Pousser la glissière extérieure vers l'avant pour verrouiller l'adaptateur en place.
NOTE : La connexion doit être serrée et non lâche. Si la connexion est lâche, l'adaptateur ne fonctionnera pas correctement. Répétez l'étape 2 jusqu'à ce que la connexion soit serrée.
Étape 4
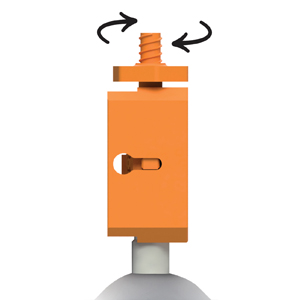
Tournez le bouton dans le sens des aiguilles d'une montre pour engager la vanne de service et sécuriser la connexion.
NOTE : Veillez à tourner le bouton à fond - la résistance est normale.
Étape 5
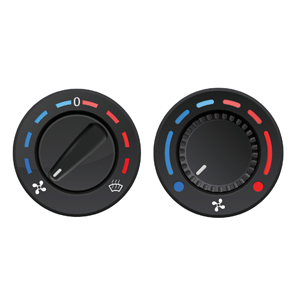
Avant d'injecter le colorant, démarrez le moteur et réglez la climatisation sur le niveau de refroidissement maximal.
Attention : Attention aux pièces mobiles du moteur.

Étape 5
Avant d'injecter le colorant, démarrez le moteur et réglez la climatisation sur le niveau de refroidissement maximal.
Attention : Attention aux pièces mobiles du moteur.
Étape 6
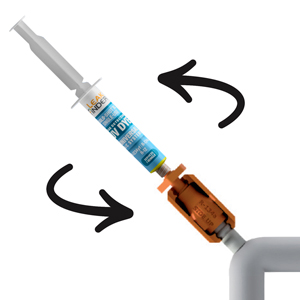
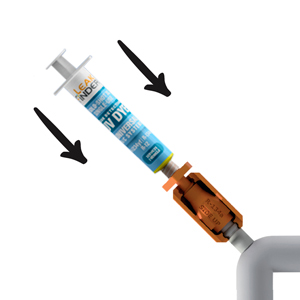
Retirez le capuchon de la seringue et vissez l'embout dans le port de réception de l'adaptateur.
Étape 7
Appuyez fermement sur le piston de la seringue et injectez le colorant dans votre système. Une fois le piston vide, débranchez-le et jetez-le. Laisser le colorant circuler pendant 5 à 10 minutes lorsque le véhicule est en marche.

Étape 7
Appuyez fermement sur le piston de la seringue et injectez le colorant dans votre système. Une fois le piston vide, débranchez-le et jetez-le. Laisser le colorant circuler pendant 5 à 10 minutes lorsque le véhicule est en marche.
Étape 8
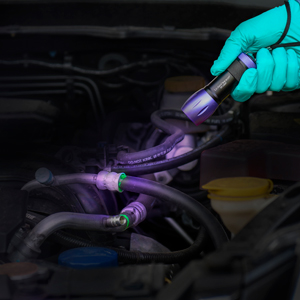
Arrêter le moteur. Inspectez les zones de fuites possibles avec la lampe de poche de détection de fuites LeakFinder®. Les fuites s'allument en vert vif.
Étape 9
Une fois les fuites réparées, nettoyez les restes de colorant à l'aide d'un nettoyant pour colorant ou d'un nettoyant pour atelier.
Étape 10
Faites fonctionner le système de climatisation pendant encore 5 à 10 minutes et réinspectez-le à l'aide d'une lampe de poche. L'absence de lueur signifie que toutes les fuites ont été réparées.
NOTE : Le LF100CS est livré avec un tuyau d'extension flexible en option.
Avant de connecter la seringue à l'adaptateur double (comme indiqué à l'étape 6), fixez d'abord le tuyau d'extension à la seringue. Suivant, appuyer sur le piston de la seringue pour faire passer une petite quantité de colorant dans le tuyau vide (une petite quantité de colorant doit apparaître à l'extrémité du tuyau d'extension). Cette étape permet de purger le tuyau de l'air et est nécessaire pour l'injection. Enfin, connectez la seringue avec son tuyau d'extension purgé à l'adaptateur double et injectez le colorant dans le système (étape 7).
ADAPTATEUR DOUBLE
ADAPT
Identifier le type de système réfrigérant (R-1234yf ou R-134a) et préparez l'adaptateur.
CONNECTER
Connectez l'adaptateur au port de service du côté bas.
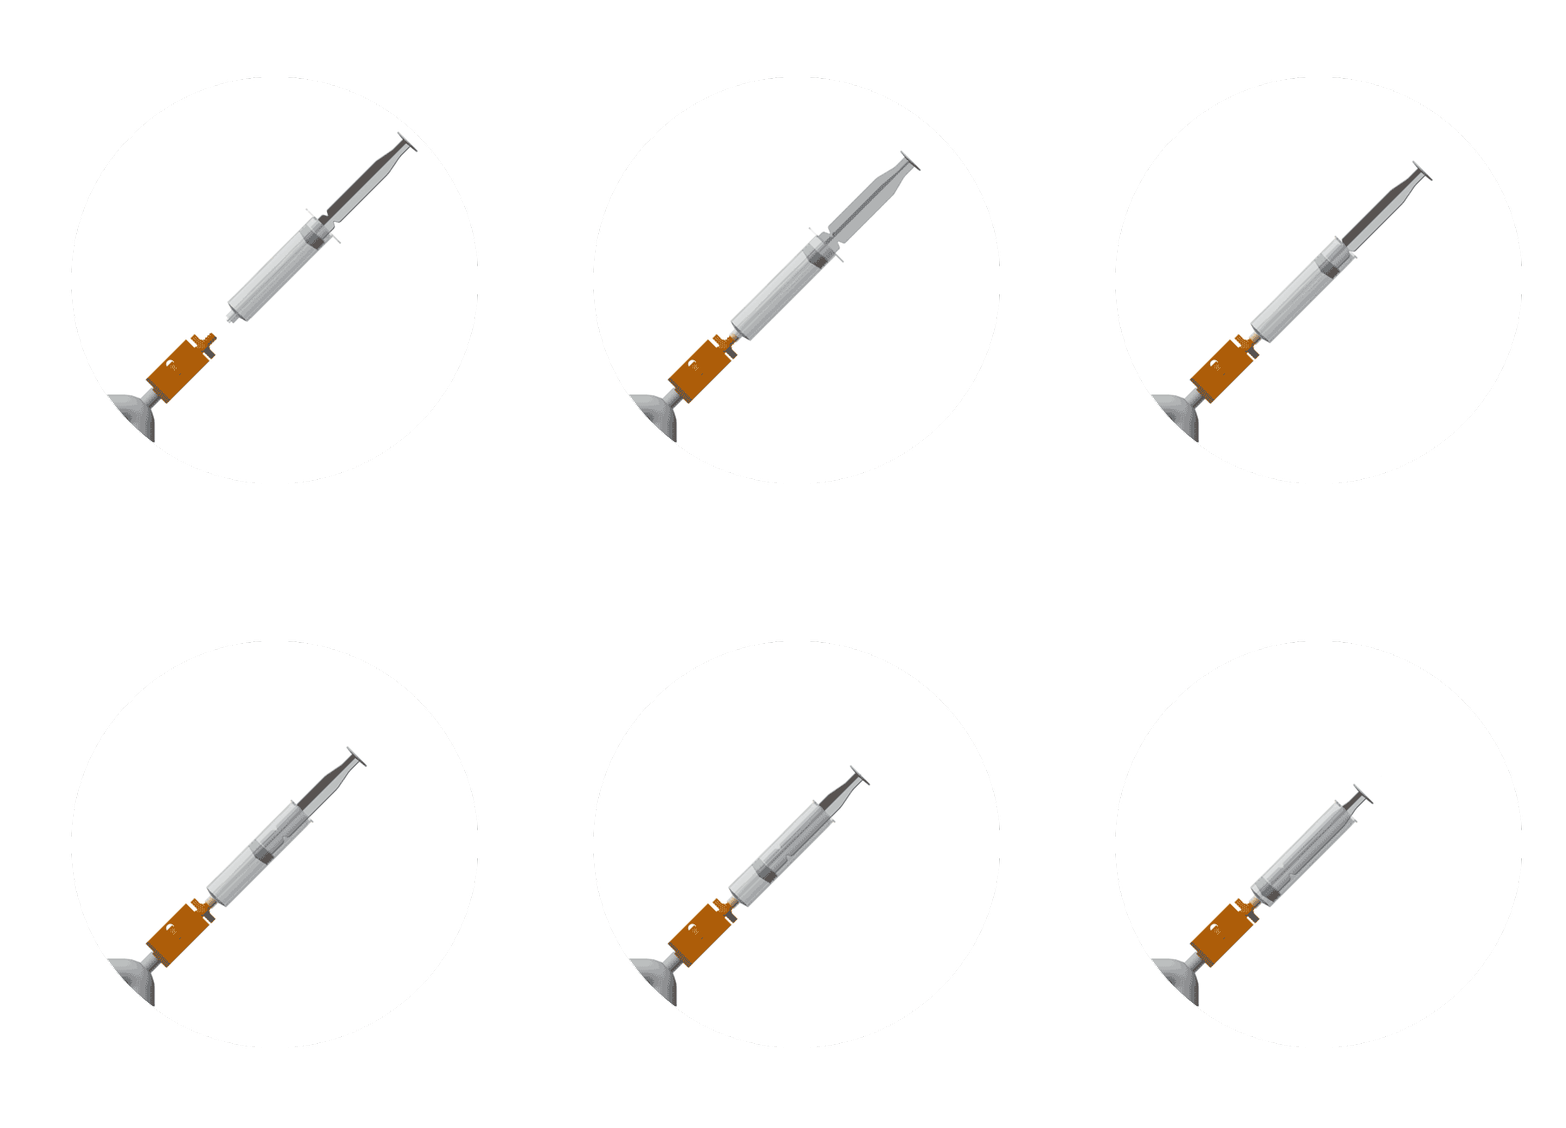
INJECT
Installer la seringue et injecter le colorant.
DÉTAILS
- Les colorants UV universels LeakFinder® permettent la détection la plus précise des fuites pour tous les systèmes de climatisation automobile contenant du R-134a, du R-1234yf ou d'autres fluides frigorigènes largement utilisés.
- Peut être ajouté au système en toute sécurité. Le colorant n'affecte pas les propriétés du lubrifiant du système et ne modifie pas le fonctionnement de l'équipement.
- Les colorants LeakFinder® permettent de détecter les fuites les plus petites et les plus problématiques qui seraient autrement impossibles à déceler.
- • Compatible avec EV/Hybrid. Utilisation sans danger dans les compresseurs de climatisation à entraînement électrique.
IMPORTANT
- Portez des lunettes de protection lorsque vous travaillez sur un système de climatisation.
- Pour les systèmes de climatisation des véhicules, utiliser la totalité de la seringue préremplie de colorant universel pour climatisation LeakFinder® pour l'entretien d'un seul véhicule.
- L'adaptateur est destiné à à usage unique.
- Avant d'injecter la seringue préremplie de colorant universel pour climatisation LeakFinder dans un système de climatisation, inspectez le(s) orifice(s) de service et les noyaux de valve pour vérifier qu'ils ne sont pas endommagés.
Dépannage des produits
Si le Adaptateur LF100CS est accidentellement démonté, veuillez vous référer au diagramme ci-dessous et suivre les instructions. Une animation du produit est également disponible et fournit une référence visuelle pour le remontage.
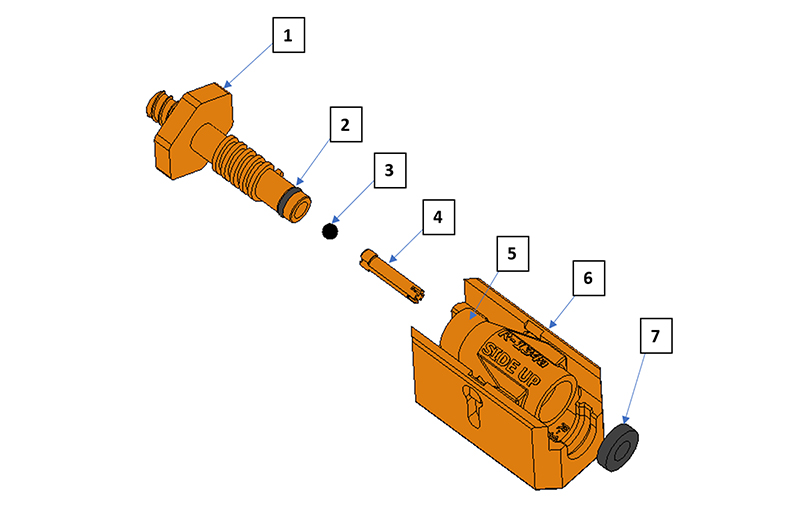
ADAPTATEUR LF100CS | ||
ITEM | QTÉ | DESCRIPTION |
1 | 1 | KNOB |
2 | 1 | JOINT TORIQUE |
3 | 1 | BALL |
4 | 1 | PIN |
5 | 1 | CORPS INTÉRIEUR |
6 | 1 | GLISSIÈRE EXTÉRIEURE |
7 | 1 | GASKET |
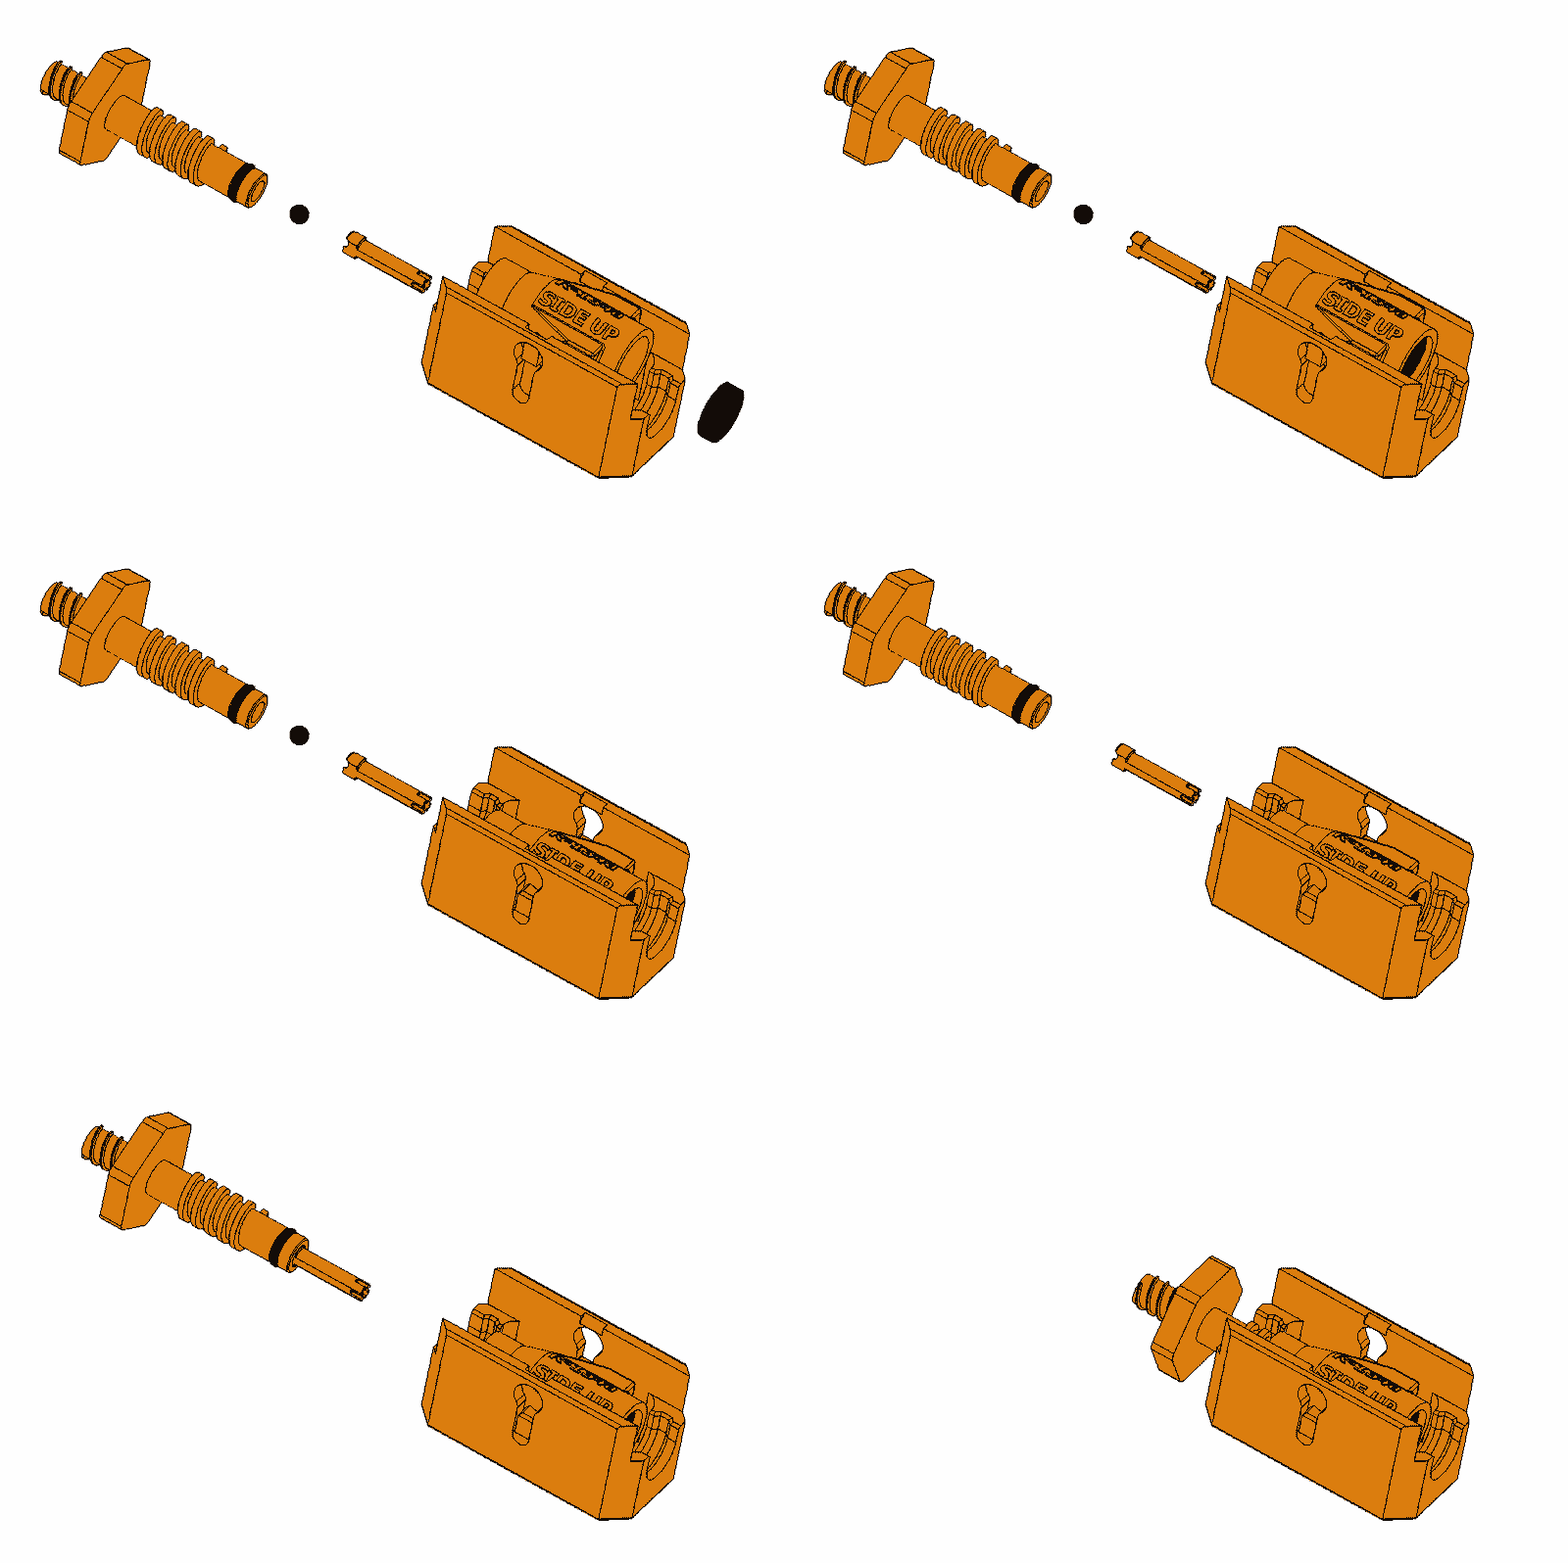
Si le joint (élément 7) est déconnecté, replacez fermement le joint dans la glissière extérieure (6). Si le bouton (1) est déconnecté de l'adaptateur, assurez-vous d'abord que la bille (3) est insérée dans l'ouverture inférieure du bouton, puis continuez à placer la goupille (4) dans l'ouverture du bouton. Ensuite, tourner le bouton dans le sens des aiguilles d'une montre pour l'insérer dans la partie supérieure de la glissière extérieure (6). Le bouton et la glissière extérieure sont maintenant fixés et l'adaptateur LF100CS est prêt à être utilisé.
AVERTISSEMENT : Tenir hors de portée des enfants. Se laver soigneusement après manipulation. Essuyer tout liquide renversé pour éviter les taches. Conserver dans un endroit frais, à l'abri de la lumière du soleil. Stocker dans un endroit sec et climatisé. Entreposer à une température de 40-100˚F (4,4-37,7˚C). Éliminer conformément aux réglementations locales, nationales et fédérales.