INSTRUÇÕES
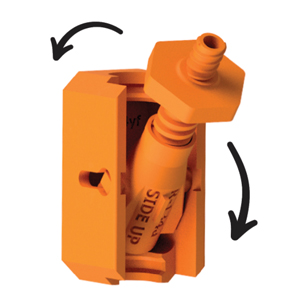
Passo 1
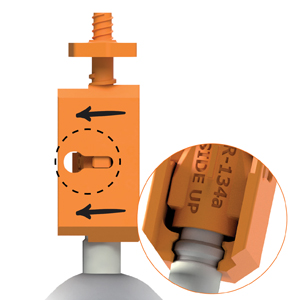
Identifique o tipo de sistema de refrigerante (consulte o manual do proprietário) e prepare o adaptador. Segurando o adaptador duplo na mão, gire o corpo interno para R-134a ou R-1234yf LADO PARA CIMA, consoante o seu tipo de sistema.
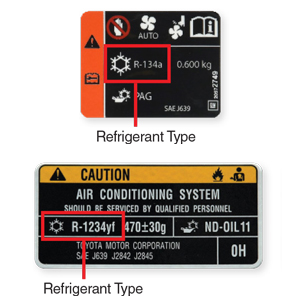
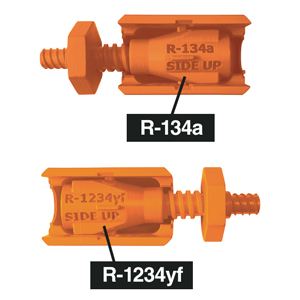
Passo 2
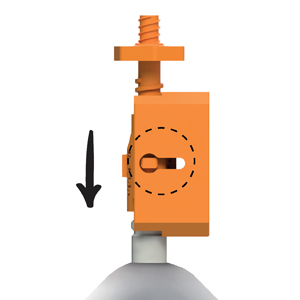
Localize o orifício de serviço do ar condicionado do lado inferior. Empurre o adaptador para a porta de serviço do lado inferior.
NOTA: Certifique-se de que a corrediça exterior é empurrada para trás, afastando-se do corpo interior (ver linha pontilhada).
Passo 3
Empurre a corrediça exterior para a frente para bloquear o adaptador no lugar.
NOTA: A ligação deve ser apertada, não solta. Se a ligação estiver solta, o adaptador não funcionará corretamente. Repita o passo 2 até que a ligação fique firme.

Passo 3
Empurre a corrediça exterior para a frente para bloquear o adaptador no lugar.
NOTA: A ligação deve ser apertada, não solta. Se a ligação estiver solta, o adaptador não funcionará corretamente. Repita o passo 2 até obter uma ligação firme.
Passo 4
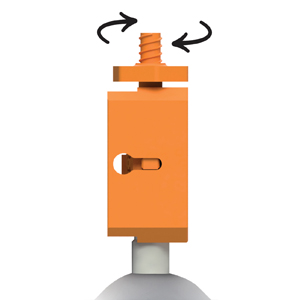
Rode o botão no sentido dos ponteiros do relógio para engatar a válvula de serviço e assegurar uma ligação.
NOTA: Certifique-se de que roda o botão até ao fundo - a resistência é normal.
Passo 5
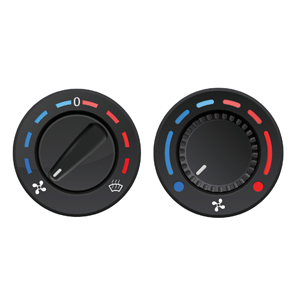
Before injecting dye, start the engine and adjust the A/C to the maximum cooling level.
Cuidado: Cuidado com as peças móveis do motor.

Passo 5
Before injecting dye, start the engine and adjust the A/C to the maximum cooling level.
Cuidado: Cuidado com as peças móveis do motor.
Passo 6
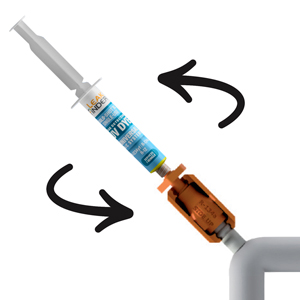
Retirar a tampa da seringa e enroscar a ponta no orifício de receção do adaptador.
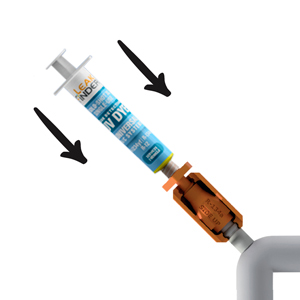
Passo 7
Push firmly down on syringe plunger and inject dye into your system. Once plunger is empty, disconnect and dispose. Allow 5-10 minutes for dye to circulate while vehicle is running.

Passo 7
Push firmly down on syringe plunger and inject dye into your system. Once plunger is empty, disconnect and dispose. Allow 5-10 minutes for dye to circulate while vehicle is running.
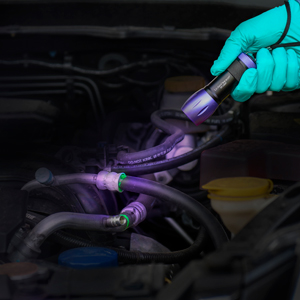
Step 8
Turn off the engine. Inspect possible leak areas with LeakFinder® leak detection flashlight. Leaks will glow bright green.
Step 9
After the leaks are repaired, clean the remaining dye from the leak sites with dye cleaner or shop cleaner.
Step 10
Run the A/C system for another 5-10 minutes and reinspect with flashlight. No glows means that all leaks have been repaired.
Step 9
After the leaks are repaired, clean the remaining dye from the leak sites with dye cleaner or shop cleaner.
Step 10
Run the A/C system for another 5-10 minutes and reinspect with flashlight. No glows means that all leaks have been repaired.
NOTA: The LF100CS comes with uma mangueira de extensão flexível opcional.
Antes de ligar a seringa ao adaptador duplo (como ilustrado no Passo 6), ligue primeiro a mangueira de extensão à seringa. Seguinte, press down on the syringe plunger to advance a small amount of dye through the empty hose (a small amount of dye should appear at the end of the extension hose). This step will purge the hose of air and is necessary for injection. Lastly, connect the syringe with its purged extension hose to the dual adapter and inject dye into the system (Step 7).
ADAPTADOR DUPLO
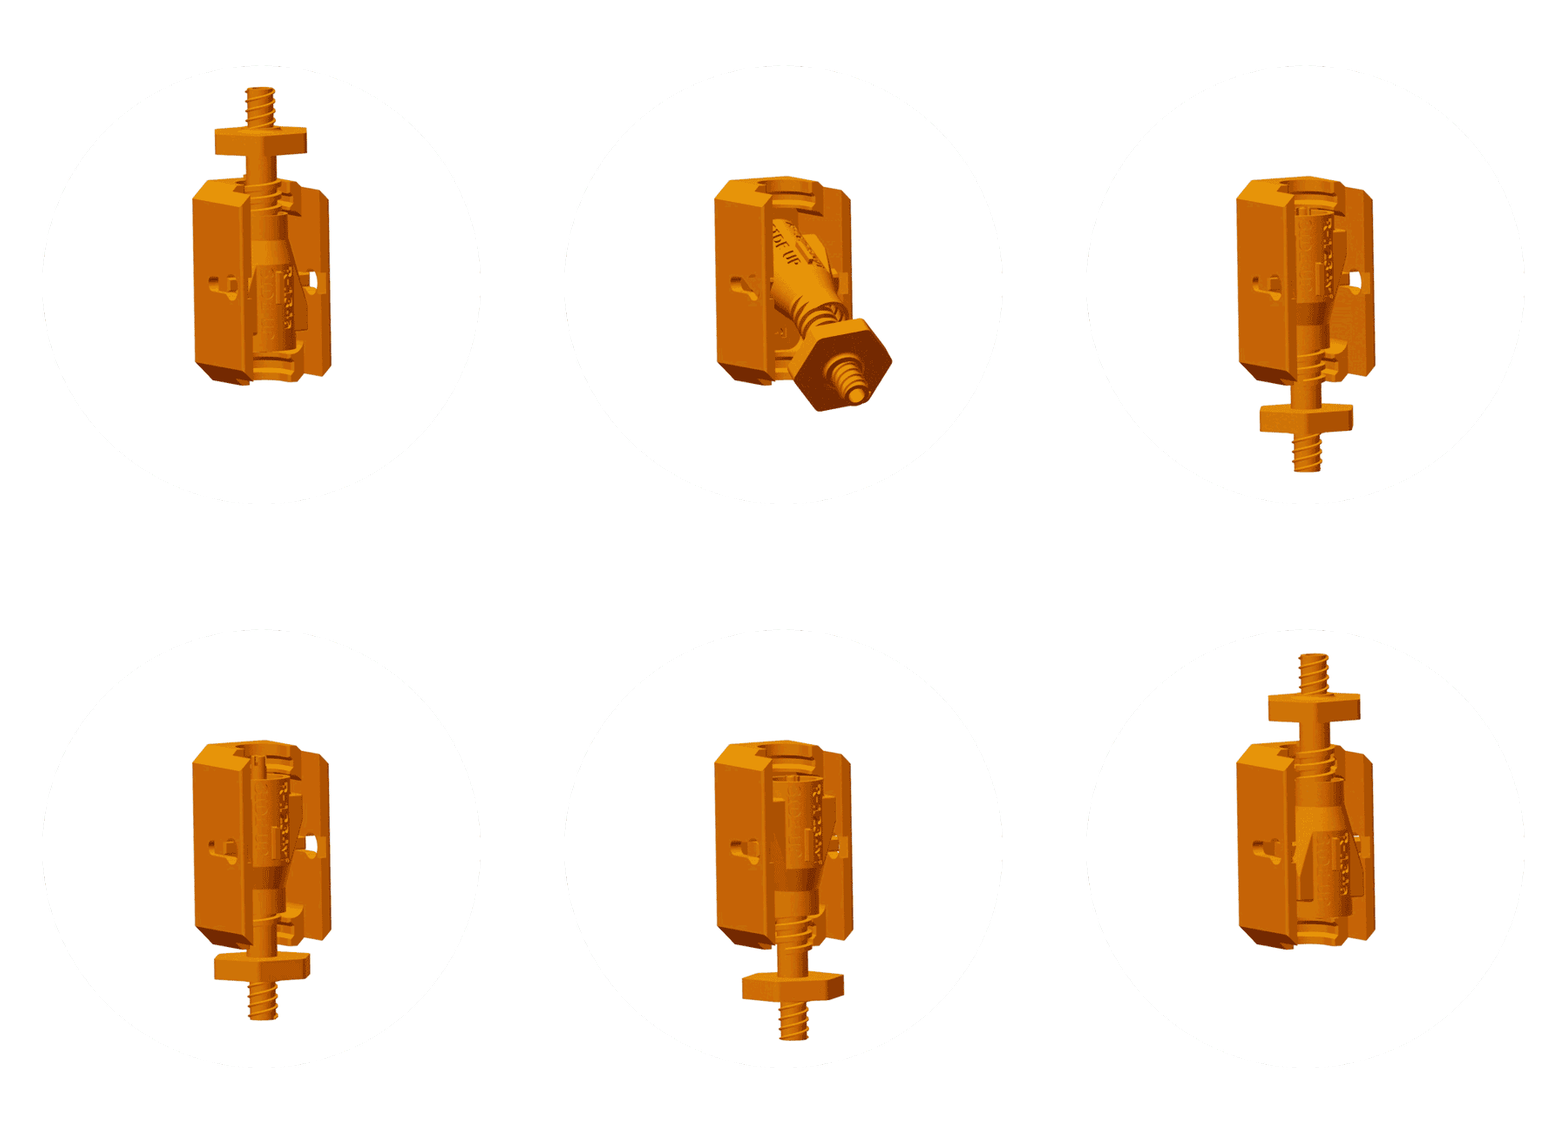
ADAPTAR
Identificar o tipo de sistema de refrigeração (R-1234yf ou R-134a) e preparar o adaptador.
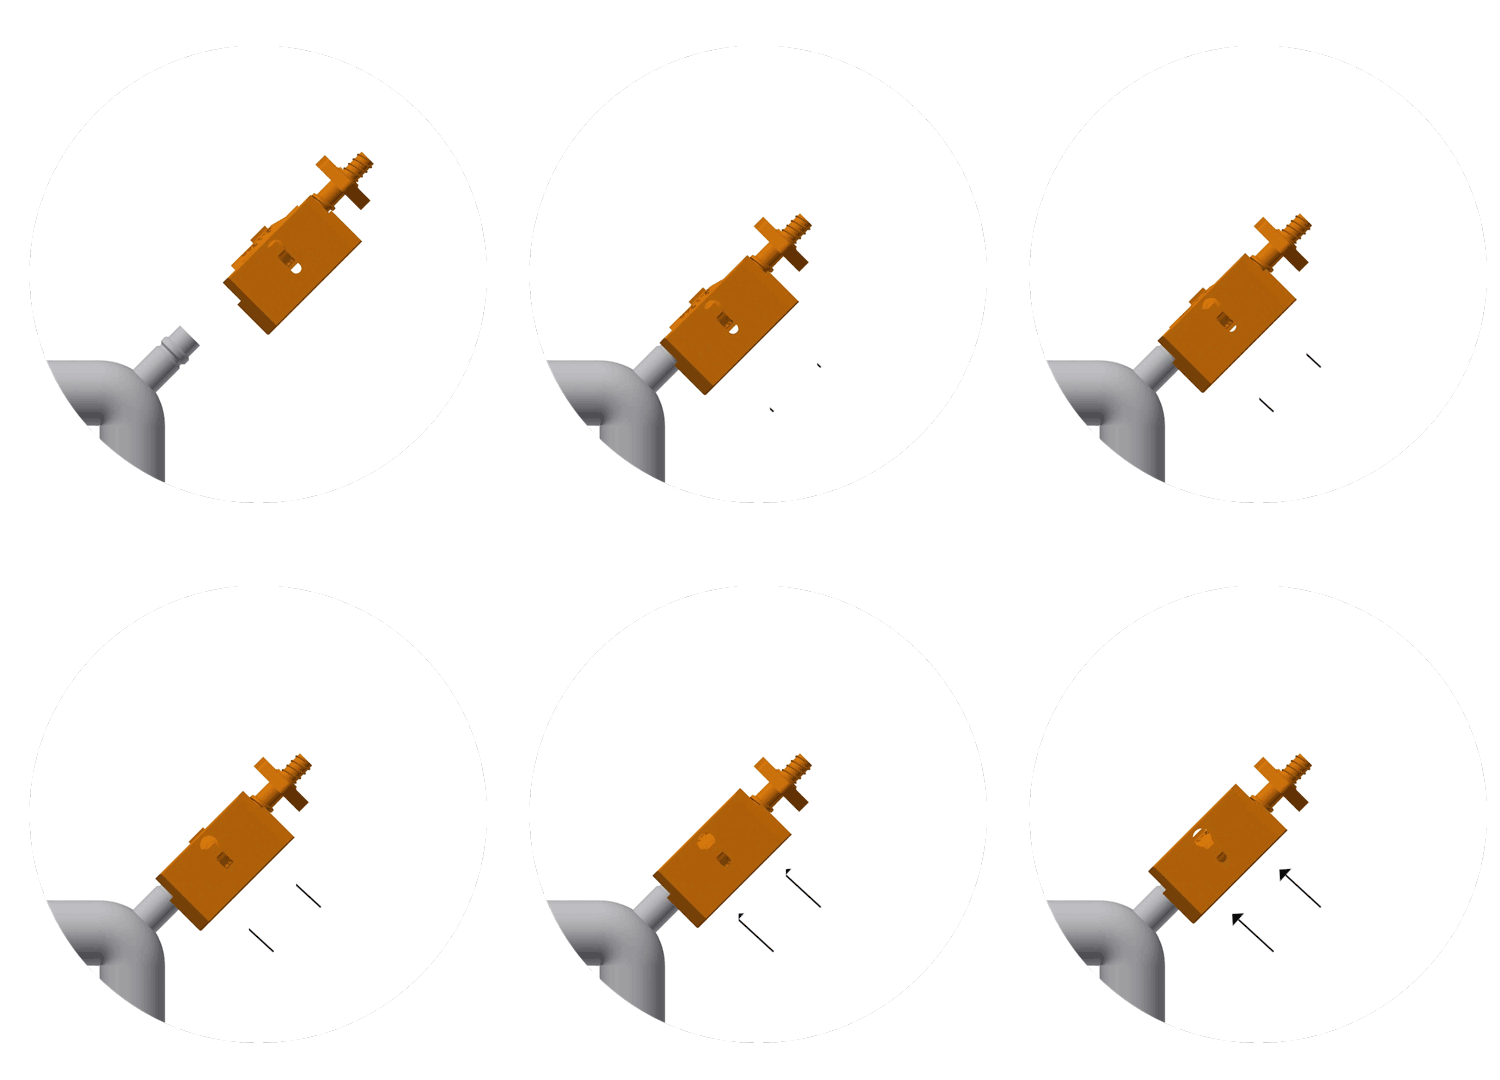
LIGAR
Ligar o adaptador à porta de serviço do lado inferior.
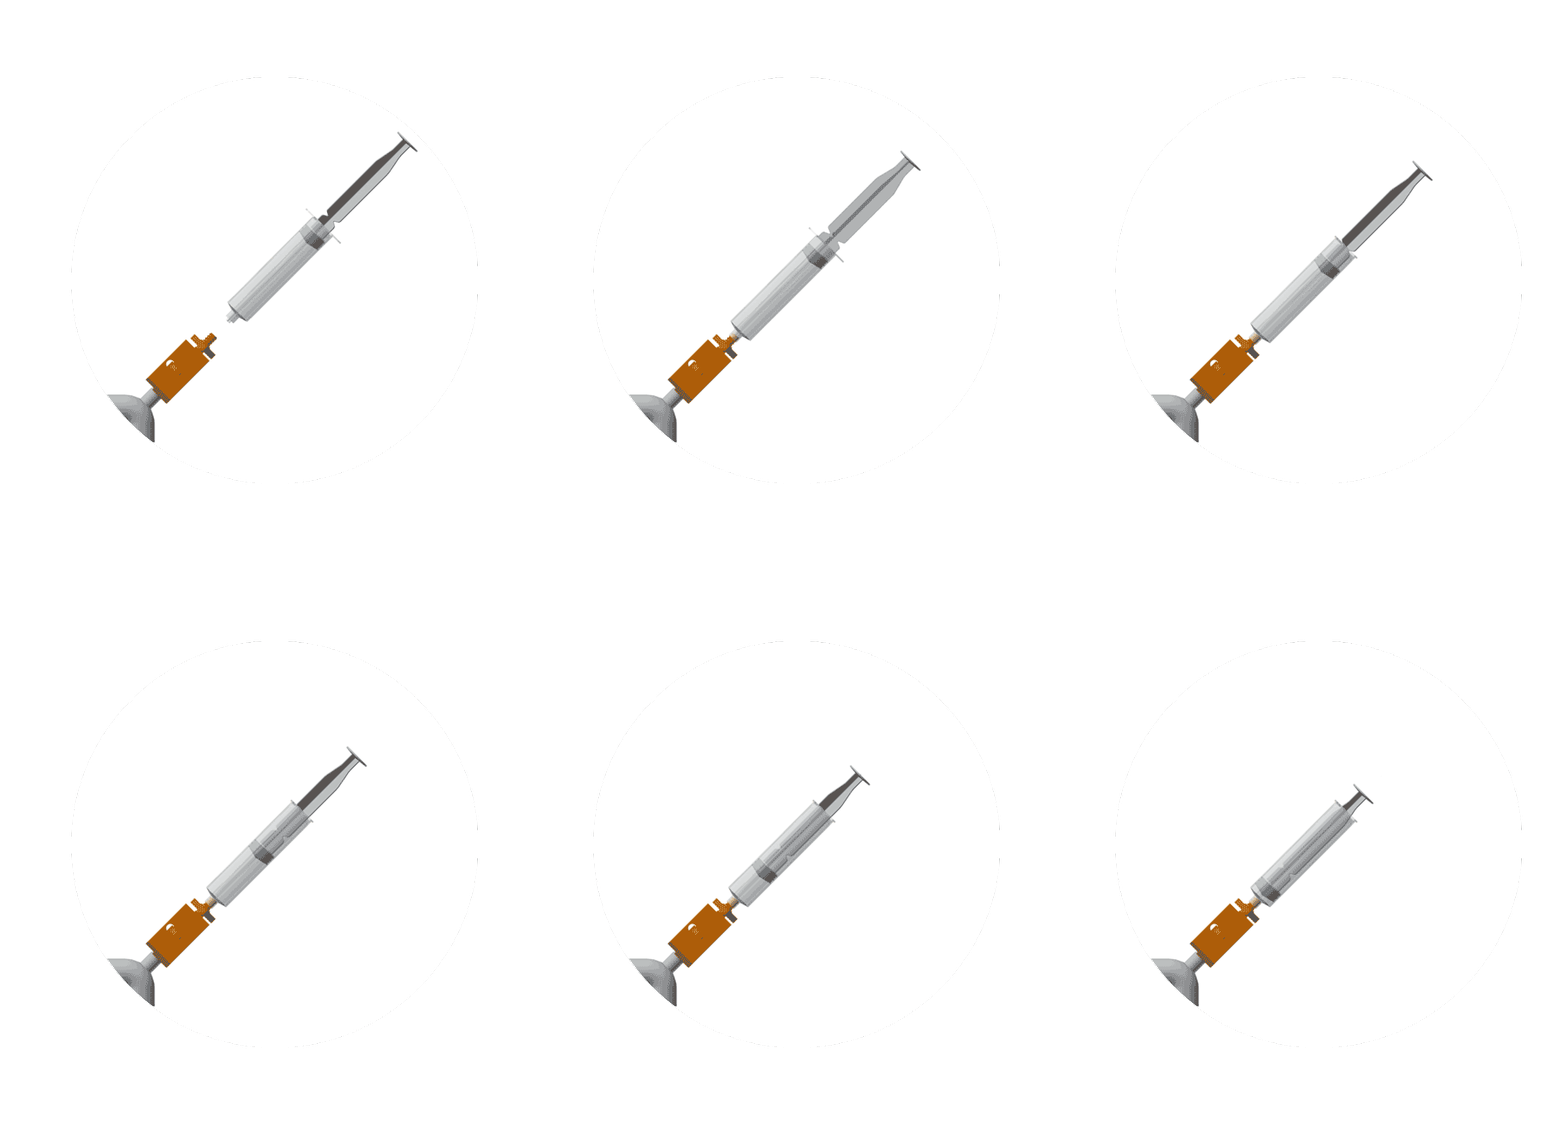
INJETAR
Install the syringe and inject dye.
DETALHES
• LeakFinder® Universal UV Dyes provide the most precise leak detection for all automotive A/C systems containing R-134a, R-1234yf, or other widely used refrigerants.
• Can be safely added to the system. The dye will not affect the system lubricant properties or change how the equipment works.
• LeakFinder® dyes find the smallest and most problematic leaks that would otherwise be impossible to detect.
• Compatible with EV/Hybrid. Seguro para utilização em compressores de ar condicionado acionados eletricamente.
IMPORTANTE
• Wear protective glasses or goggles while working on any A/C systems.
• For vehicle A/C systems, use the entire LeakFinder® universal A/C dye prefilled syringe to service single vehicle.
- O adaptador destina-se a de utilização única.
• Prior to injecting LeakFinder universal A/C dye prefilled syringe into an A/C system, inspect the service port (s) and valve cores for damage.
Resolução de problemas do produto
If the LF100CS Adapter is accidentally disassembled, please reference the diagram below and follow the instructions. A product animation is also available and provides a visual reference for reassembly.
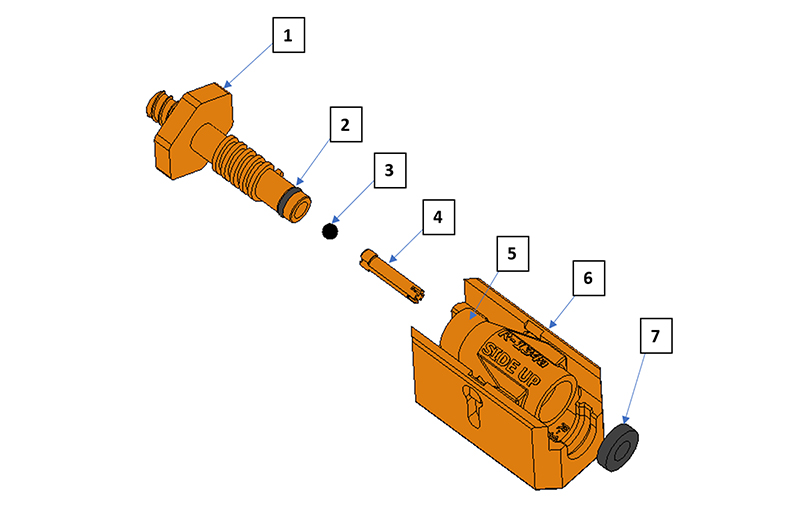
ADAPTADOR LF100CS | ||
ITEM | QUANTIDADE | DESCRIÇÃO |
1 | 1 | BOTÃO |
2 | 1 | O-RING |
3 | 1 | BOLA |
4 | 1 | PIN |
5 | 1 | CORPO INTERNO |
6 | 1 | LÂMINA EXTERIOR |
7 | 1 | JUNTA |
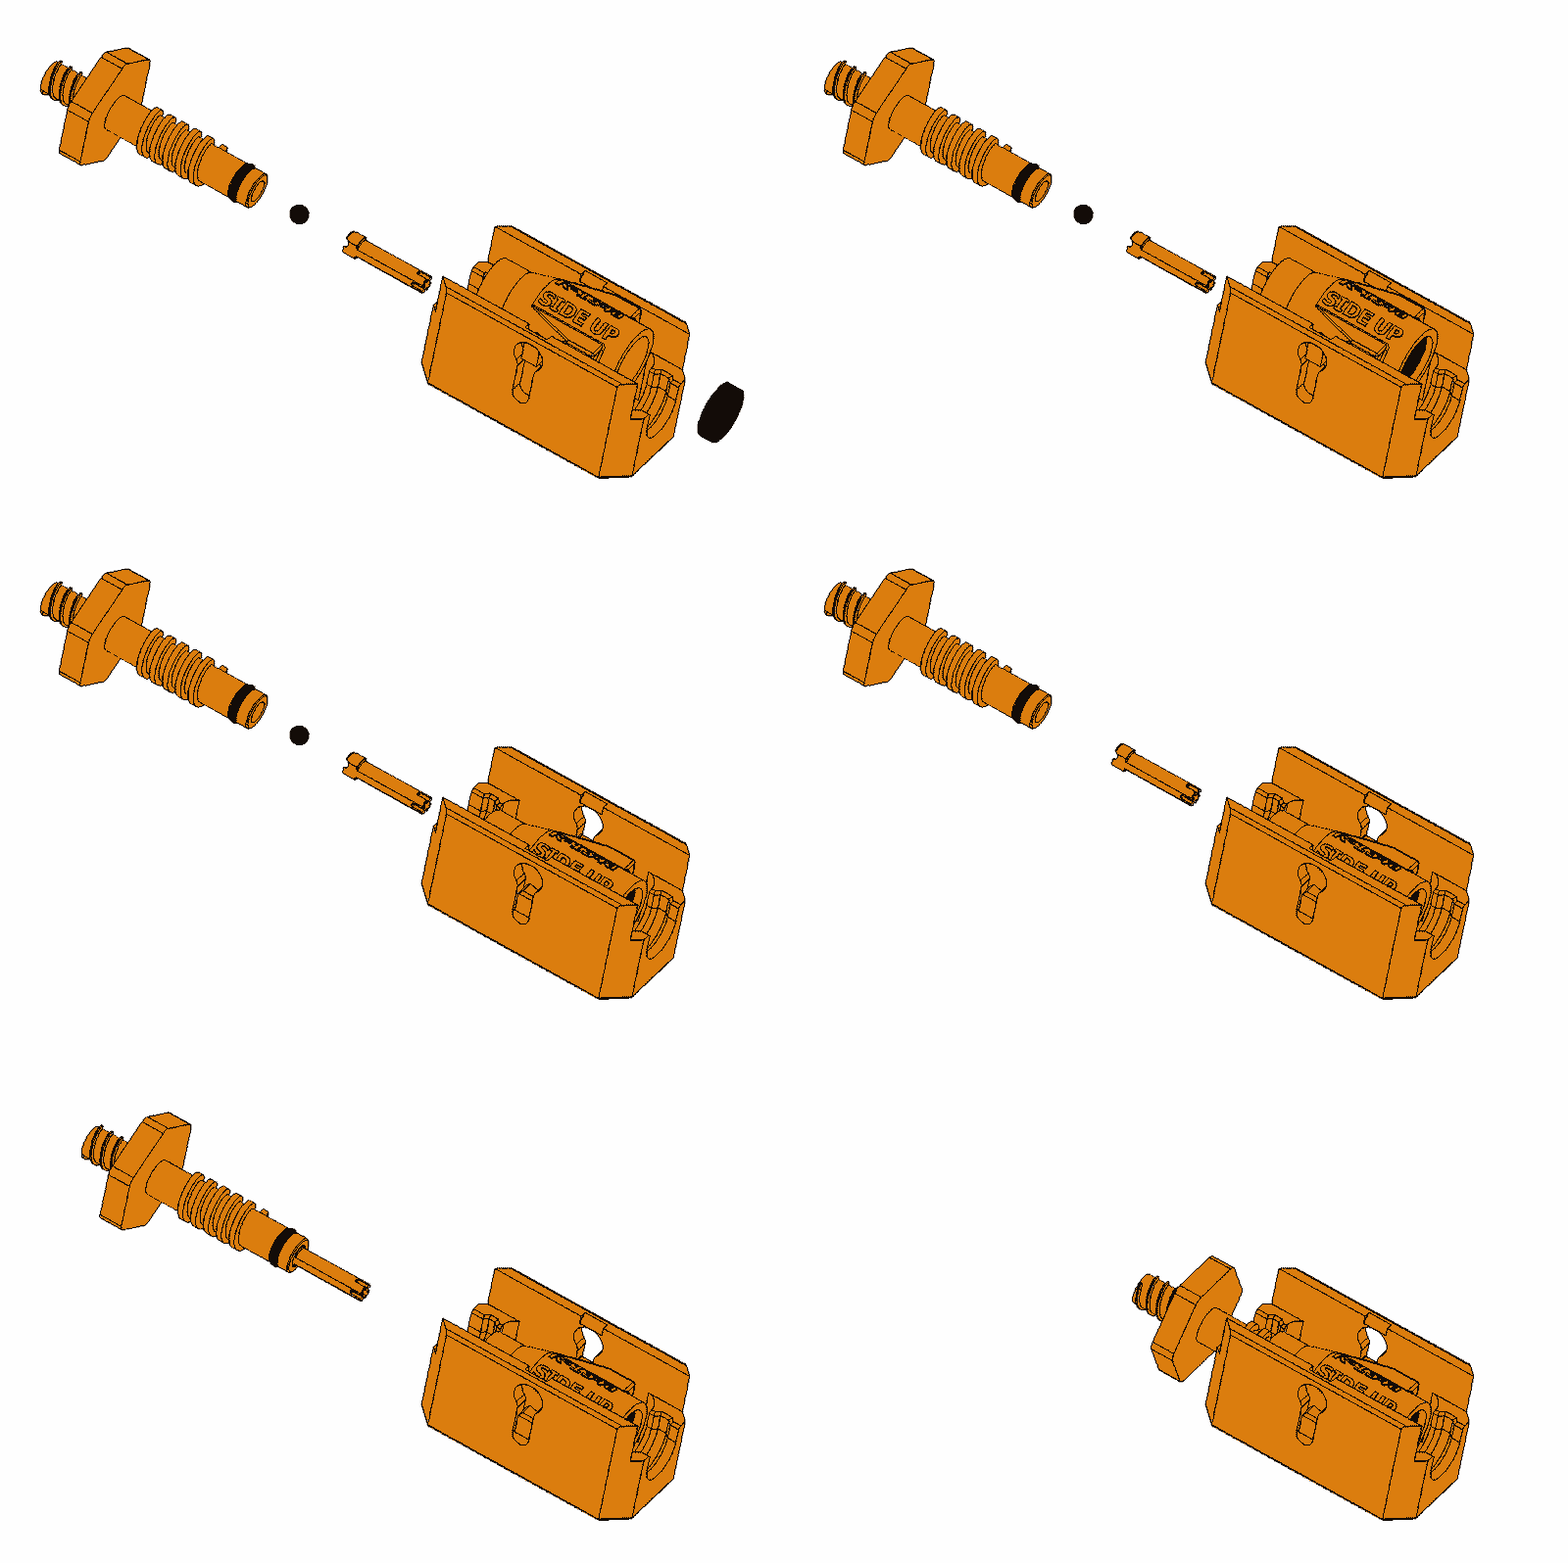
If the gasket (Item 7) is disconnected, firmly reseat the gasket in the outer slide (6). If the knob (1) is disconnected from the adapter, first ensure the ball (3) is inserted in the knob’s lower opening and then continue to place the pin (4) in the knob’s opening as well. Next, turn the knob clockwise into the top of the outer slide (6). The knob and the outer slide are now secured, and the LF100CS adapter is ready for use.
AVISO: Manter fora do alcance das crianças. Lavar cuidadosamente após o manuseamento. Limpar todos os derrames para evitar manchas. Guardar num local fresco e afastado da luz solar. Armazenar numa área climatizada e seca. Armazenar a 40-100˚F (4,4-37,7˚C). Eliminar de acordo com todos os regulamentos locais, estatais e federais.