تعليمات
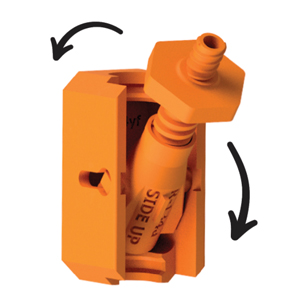
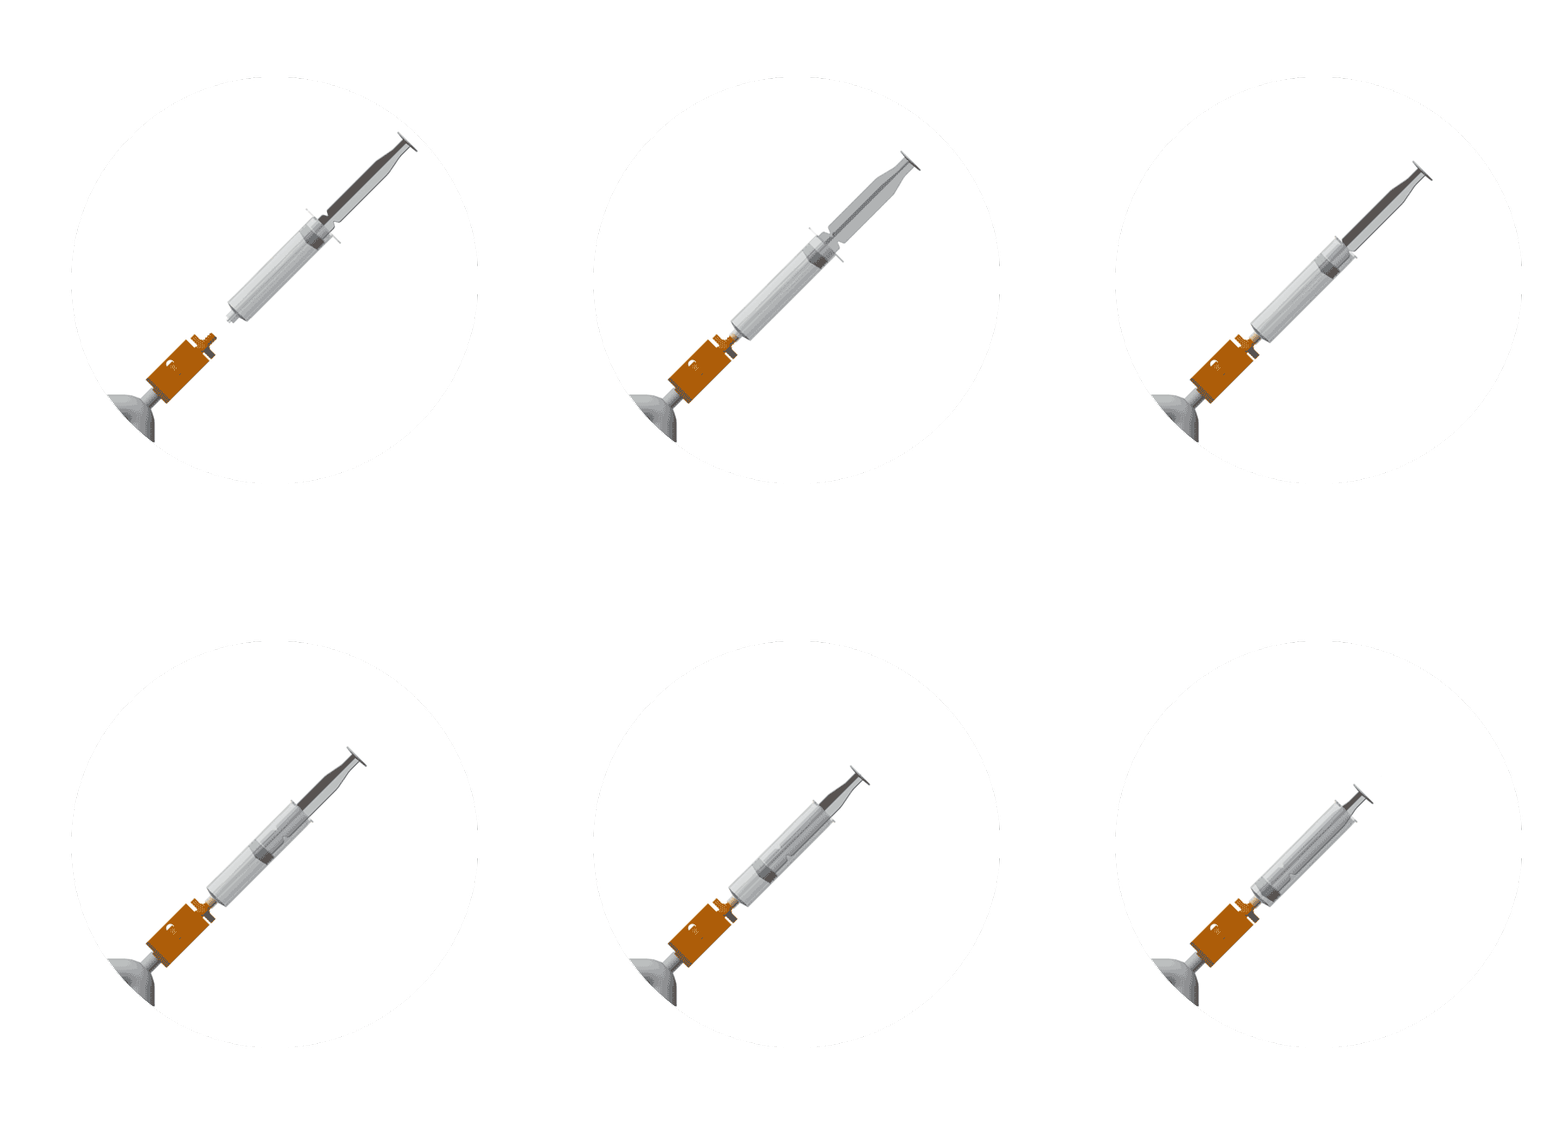
الخطوة 1
تحديد نوع نظام التبريد (انظر دليل المالك) وإعداد المحول. عند الإمساك بالمحول المزدوج في متناول اليد، قم بتدوير الجسم الداخلي إلى أي منهما R-134a أو R-1234yf الجانب لأعلى، لكل منها على نوع النظام الخاص بك.
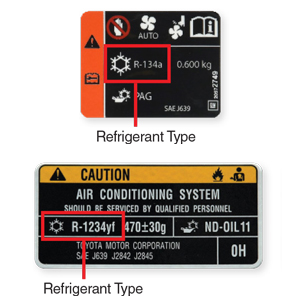
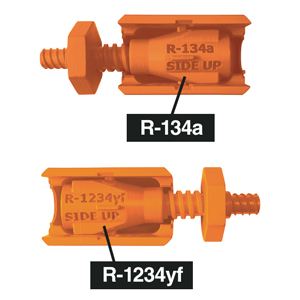
الخطوة 2
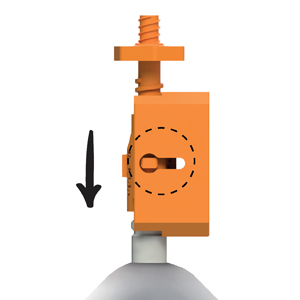
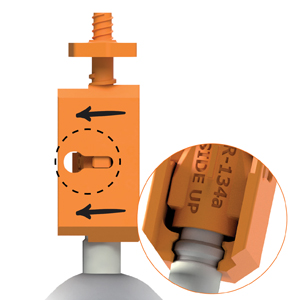
حدد موقع منفذ خدمة تكييف الهواء ذي الجانب المنخفض. ادفع المحول إلى منفذ الخدمة على الجانب المنخفض.
ملاحظه: تأكد من دفع الشريحة الخارجية للخلف بعيدا عن الجسم الداخلي (انظر الخط المنقط).
الخطوة 3
ادفع الشريحة الخارجية للأمام لقفل المحول في مكانه.
ملاحظه: يجب أن يشعر الاتصال ضيق ، وليس فضفاضة. إذا تم إجراء اتصال فضفاض ، فلن يعمل المحول بشكل صحيح. كرر الخطوة 2 حتى يتم إجراء اتصال محكم.

الخطوة 3
ادفع الشريحة الخارجية للأمام لقفل المحول في مكانه.
ملاحظه: يجب أن يشعر الاتصال ضيق ، وليس فضفاضة. إذا تم إجراء اتصال فضفاض ، فلن يعمل المحول بشكل صحيح. كرر الخطوة 2 حتى يتم إجراء اتصال ضيق.
الخطوة 4
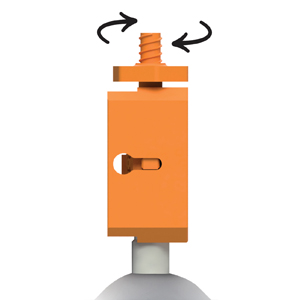
أدر المقبض في اتجاه عقارب الساعة لإشراك صمام الخدمة وتأمين الاتصال.
ملاحظه: تأكد من قلب المقبض لأسفل - المقاومة طبيعية.
الخطوة 5
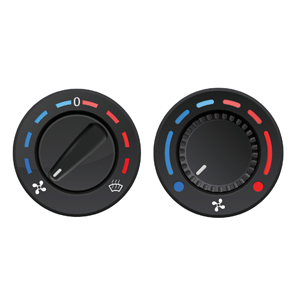
قبل حقن الصبغة، قم بتشغيل المحرك واضبط مكيف الهواء على أقصى مستوى تبريد.
أنذر: احذر من أجزاء المحرك المتحركة.

الخطوة 5
قبل حقن الصبغة، قم بتشغيل المحرك واضبط مكيف الهواء على أقصى مستوى تبريد.
أنذر: احذر من أجزاء المحرك المتحركة.
الخطوة 6
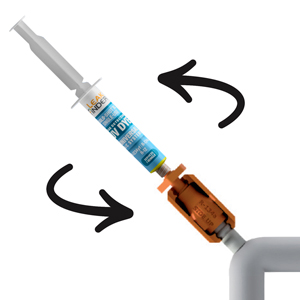
قم بإزالة غطاء المحقنة وطرف المسمار في منفذ استقبال المحول.
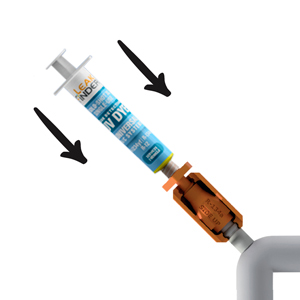
الخطوة 7
اضغط بقوة على مكبس المحقنة لأسفل واحقن الصبغة في نظامك. بمجرد أن يفرغ المكبس، افصله وتخلص منه. اترك 5-10 دقائق حتى تدور الصبغة أثناء تشغيل السيارة.

الخطوة 7
اضغط بقوة على مكبس المحقنة لأسفل واحقن الصبغة في نظامك. بمجرد أن يفرغ المكبس، افصله وتخلص منه. اترك 5-10 دقائق حتى تدور الصبغة أثناء تشغيل السيارة.
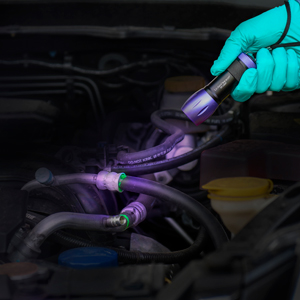
الخطوة 8
أوقف تشغيل المحرك. افحص مناطق التسرب المحتملة باستخدام مصباح كاشف التسرب LeakFinder®. ستتوهج التسريبات باللون الأخضر الفاتح.
الخطوة 9
بعد إصلاح التسريبات، قم بتنظيف الصبغة المتبقية من مواقع التسريب باستخدام منظف الصبغة أو منظف المتجر.
الخطوة 10
قم بتشغيل نظام التكييف لمدة 5-10 دقائق أخرى وأعد الفحص باستخدام مصباح يدوي. عدم وجود توهجات يعني أن جميع التسريبات قد تم إصلاحها.
الخطوة 9
بعد إصلاح التسريبات، قم بتنظيف الصبغة المتبقية من مواقع التسريب باستخدام منظف الصبغة أو منظف المتجر.
الخطوة 10
قم بتشغيل نظام التكييف لمدة 5-10 دقائق أخرى وأعد الفحص باستخدام مصباح يدوي. عدم وجود توهجات يعني أن جميع التسريبات قد تم إصلاحها.
ملاحظه: يأتي الطراز LF100CS مع خرطوم تمديد مرن اختياري.
قبل توصيل المحقنة بالمحول المزدوج (كما هو موضح في الخطوة 6) ، قم أولا بتوصيل خرطوم التمديد بالمحقنة. مقبل اضغط لأسفل على مكبس المحقنة لدفع كمية صغيرة من الصبغة عبر الخرطوم الفارغ (يجب أن تظهر كمية صغيرة من الصبغة في نهاية خرطوم التمديد). ستؤدي هذه الخطوة إلى تطهير الخرطوم من الهواء وهي ضرورية للحقن. أخيرًا، قم بتوصيل المحقنة بخرطوم التمديد المطهر بالمحول المزدوج وحقن الصبغة في النظام (الخطوة 7).
محول مزدوج
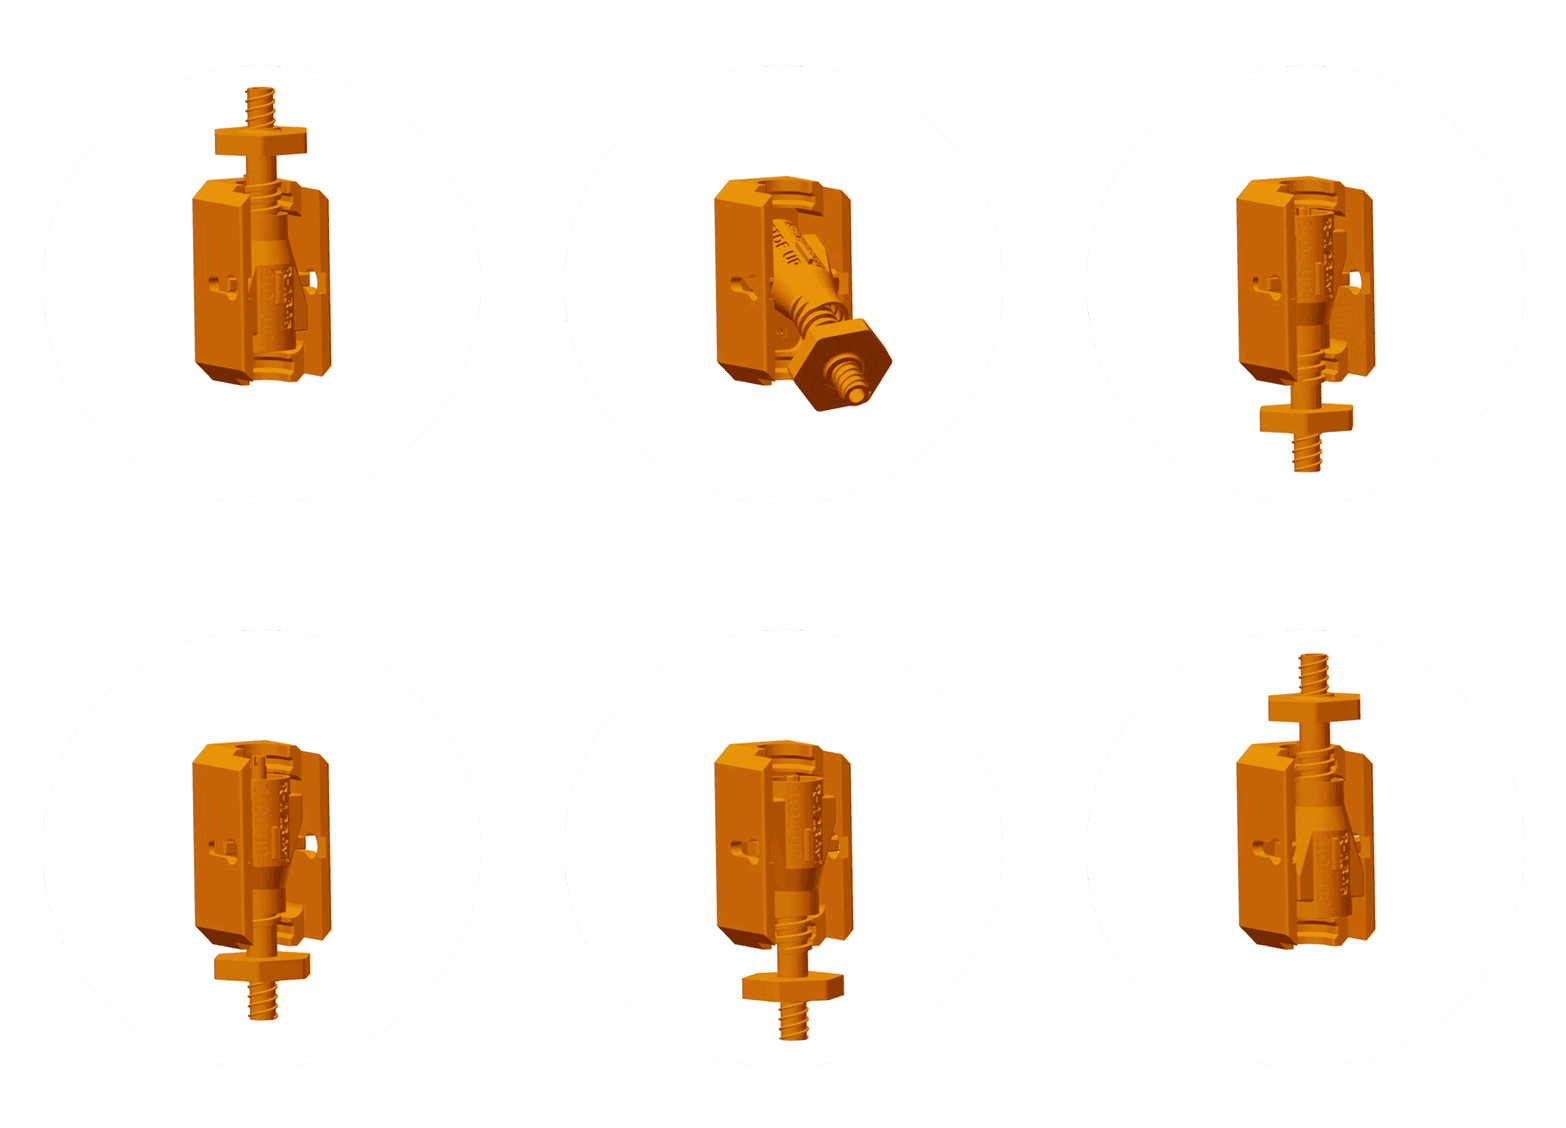
كيف
تحديد نوع نظام التبريد (R-1234yf أو R-134a) وإعداد محول.
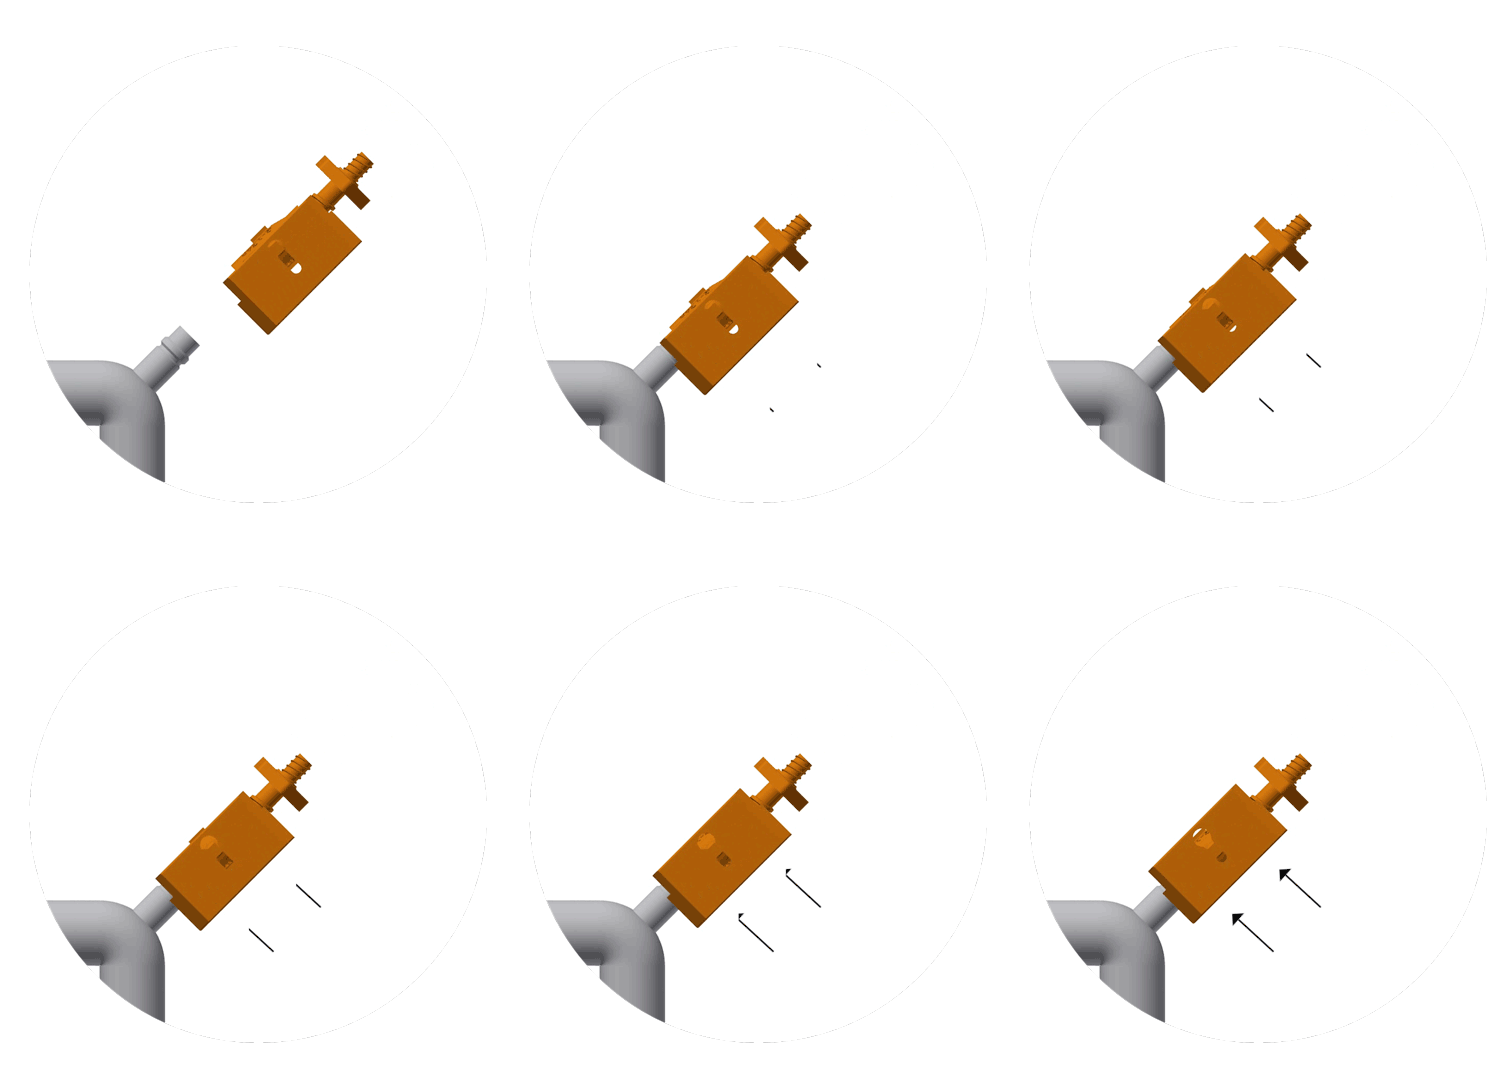
عشق
قم بتوصيل المحول بمنفذ الخدمة ذي الجانب المنخفض.
حقن
قم بتركيب المحقنة وحقن الصبغة.
التفاصيل
- توفر الأصباغ العالمية للأشعة فوق البنفسجية العالمية ®UV Dyes الأكثر دقة للكشف عن التسرب لجميع أنظمة تكييف السيارات التي تحتوي على R-134a أو R-1234yf أو غيرها من المبردات المستخدمة على نطاق واسع.
- يمكن إضافتها بأمان إلى النظام. لن تؤثر الصبغة على خصائص التشحيم في النظام أو تغير من طريقة عمل المعدات.
- تكتشف أصباغ ®LeakFinder® أصغر التسريبات وأكثرها إشكالية والتي يستحيل اكتشافها لولا ذلك.
• متوافق مع السيارات الكهربائية/الهجينة. آمن للاستخدام في ضواغط التكييف التي تعمل بالكهرباء.
مهم
- ارتد نظارات واقية أو نظارات واقية أثناء العمل على أي من أنظمة التكييف.
- بالنسبة لأنظمة تكييف الهواء في المركبات، استخدم محقنة صبغة تكييف الهواء الشاملة المملوءة مسبقًا من ®A/C المعبأة بالكامل لصيانة مركبة واحدة.
• المحول مخصص ل للاستخدام مرة واحدة.
- قبل حقن محقنة صبغة مكيف الهواء العالمية المملوءة مسبقًا بصبغة مكيف الهواء العالمية في نظام تكييف الهواء، افحص منفذ (منافذ) الخدمة وأجزاء الصمامات بحثًا عن أي تلف.
استكشاف أخطاء المنتج وإصلاحها
إذا كان محول LF100CS تم تفكيكها عن طريق الخطأ، يرجى الرجوع إلى الرسم البياني أدناه واتباع التعليمات. يتوفر أيضًا رسم متحرك للمنتج يوفر مرجعًا مرئيًا لإعادة التجميع.
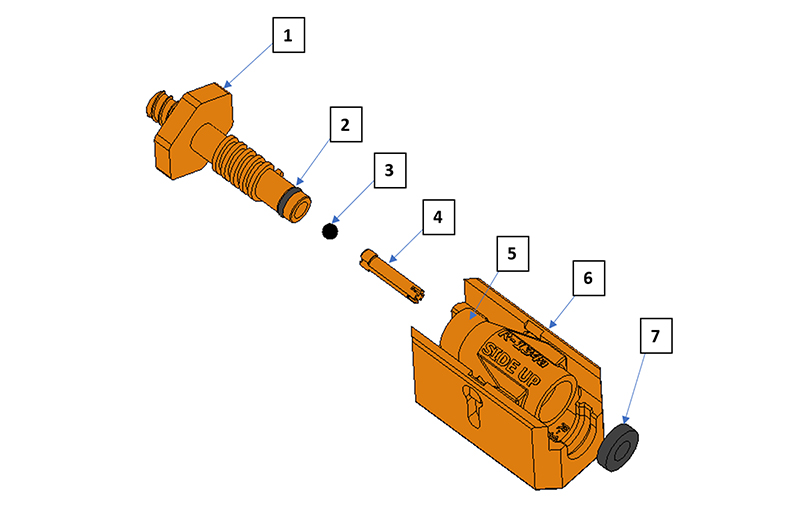
محول LF100CS | ||
بند | الكميه | وصف |
1 | 1 | مقبض |
2 | 1 | O-RING |
3 | 1 | كُرَة |
4 | 1 | دبوس |
5 | 1 | الجسم الداخلي |
6 | 1 | الشريحة الخارجية |
7 | 1 | طوقا |
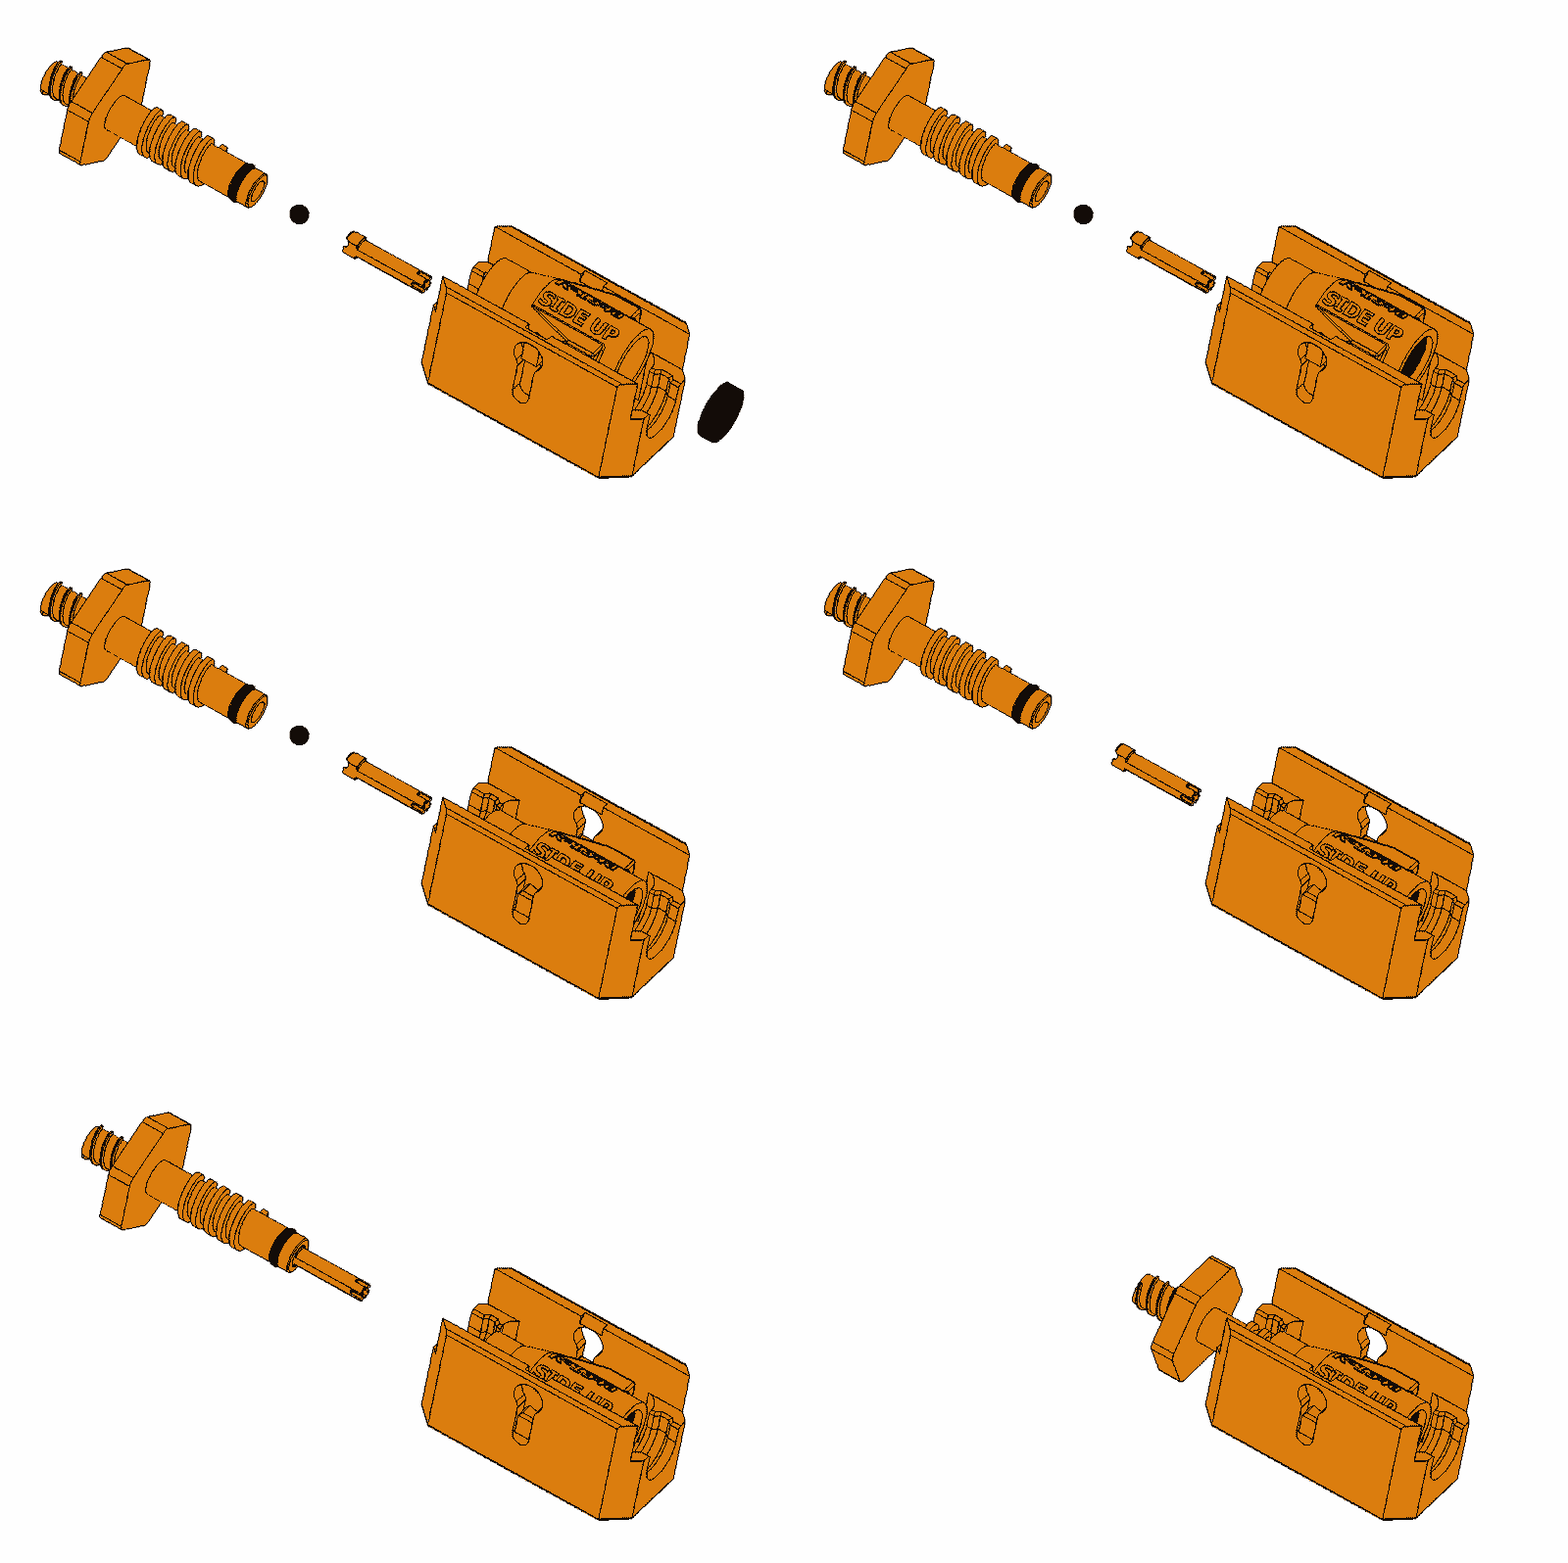
إذا كانت الحشية (البند 7) مفصولة، أعد وضع الحشية بإحكام في الشريحة الخارجية (6). إذا كان المقبض (1) مفصولاً عن المحول، فتأكد أولاً من إدخال الكرة (3) في الفتحة السفلية للمقبض ثم استمر في وضع المسمار (4) في فتحة المقبض أيضاً. بعد ذلك، أدر المقبض في اتجاه عقارب الساعة في الجزء العلوي من الشريحة الخارجية (6). يتم الآن تأمين المقبض والشريحة الخارجية، ويكون محول LF100CS جاهزًا للاستخدام.
تحذير: يحفظ بعيدا عن متناول الأطفال. يغسل جيدا بعد المناولة. امسح جميع السوائل المنسكبة لتجنب البقع. يحفظ في مكان بارد بعيدا عن أشعة الشمس. يحفظ في منطقة جافة يتم التحكم في مناخها. يخزن 40-100 درجة فهرنهايت (4.4-37.7 درجة مئوية). التخلص منها وفقا لجميع اللوائح المحلية والولائية والفيدرالية.